Updating regional hex logos
Updating regional hex logos
All regional chapters should update their hex logos to align with the new RLadies+ branding. Updates include color changes, logo updates, and switching typography to the Poppins font.

Here is an example of a regional hex logo before and after the update:


What you need
- Affinity Studio (free professional vector software)
- Regional hex logo templates (available in
.afand.pdfformats) - RLadies+ Branding Guidelines
Affinity Studio basics
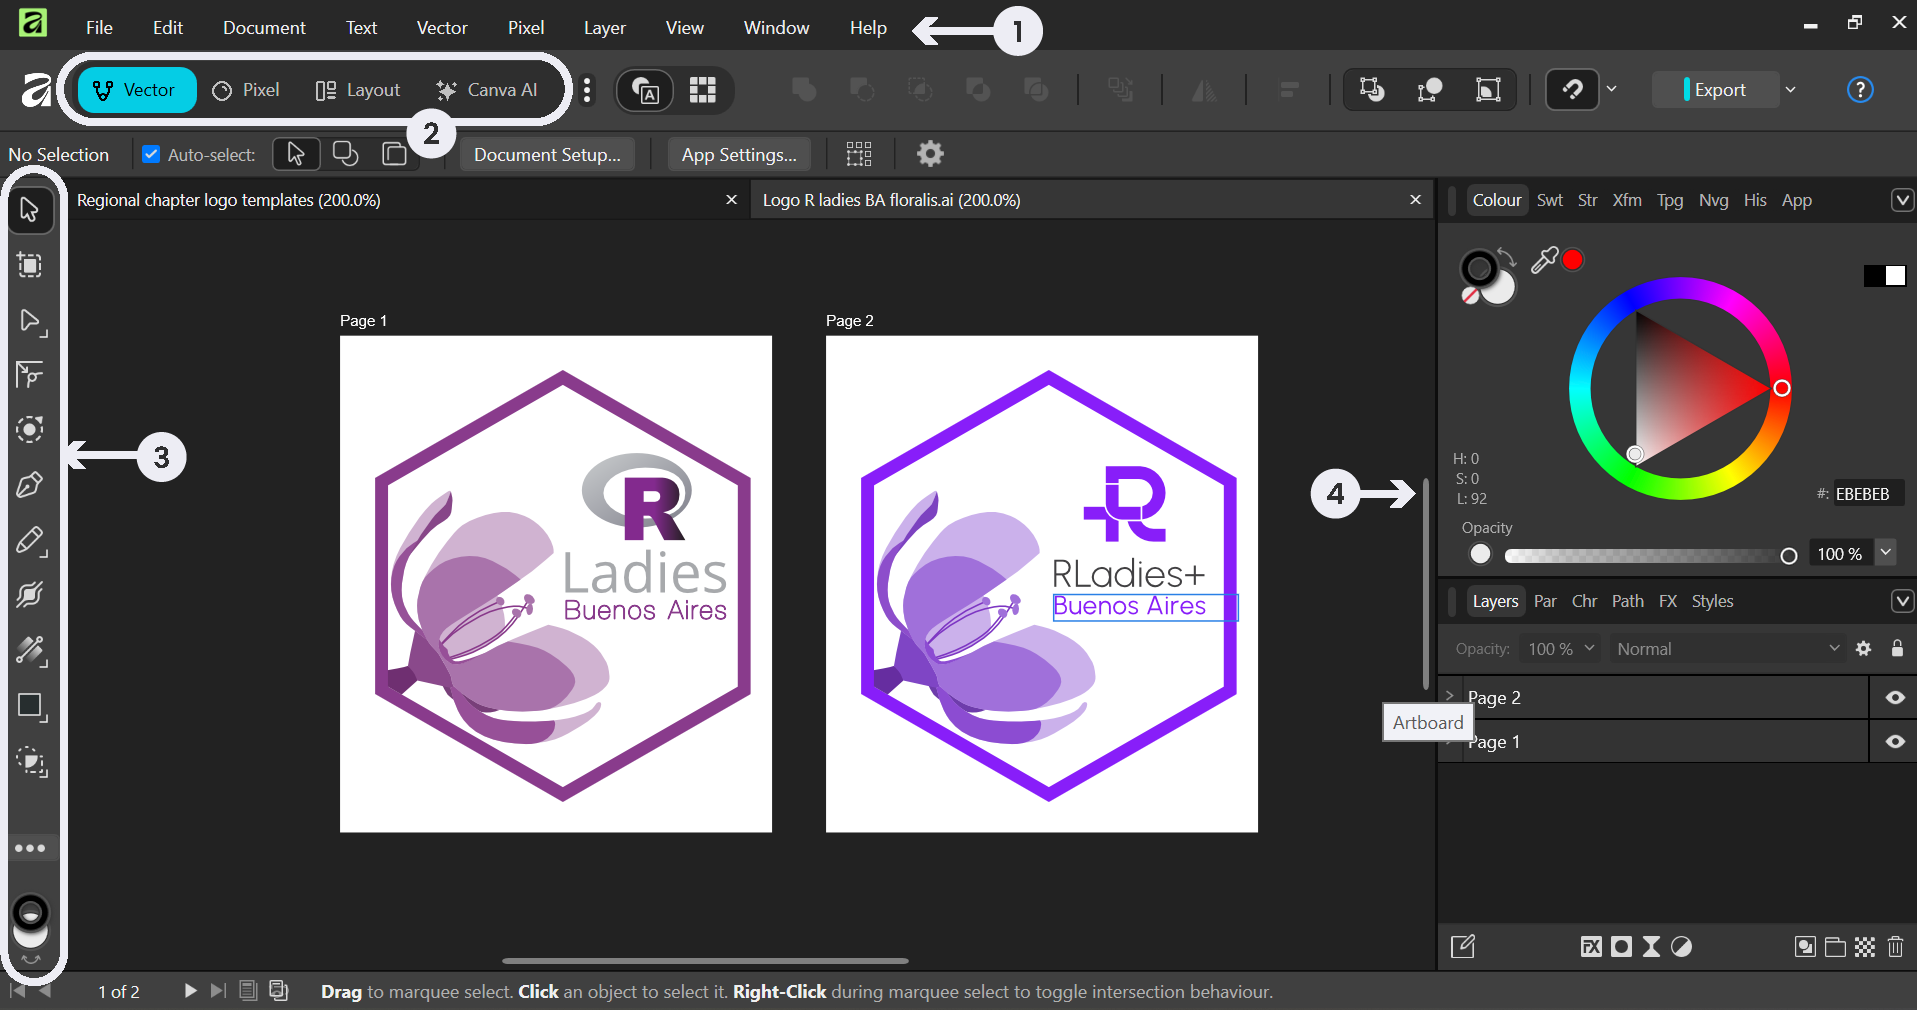
The Affinity Studio interface has four main areas:
- Top menu: File operations and settings
- Mode interface: Switch between vector and image editing (Vector Persona)
- Right-side panel: Selection, drawing, and color tools
- Left-side panel: Layers, text, and organizational features
Key tools you will use:
| Tool | Icon | Purpose |
|---|---|---|
| Move Tool |

|
Selecting and moving objects |
| Pen Tool |

|
Editing vector paths |
| Colour Picker |

|
Sampling and matching colours |
Importing files
Open existing logo files (SVG, PDF, EPS, AI) via drag-and-drop or File > Open.
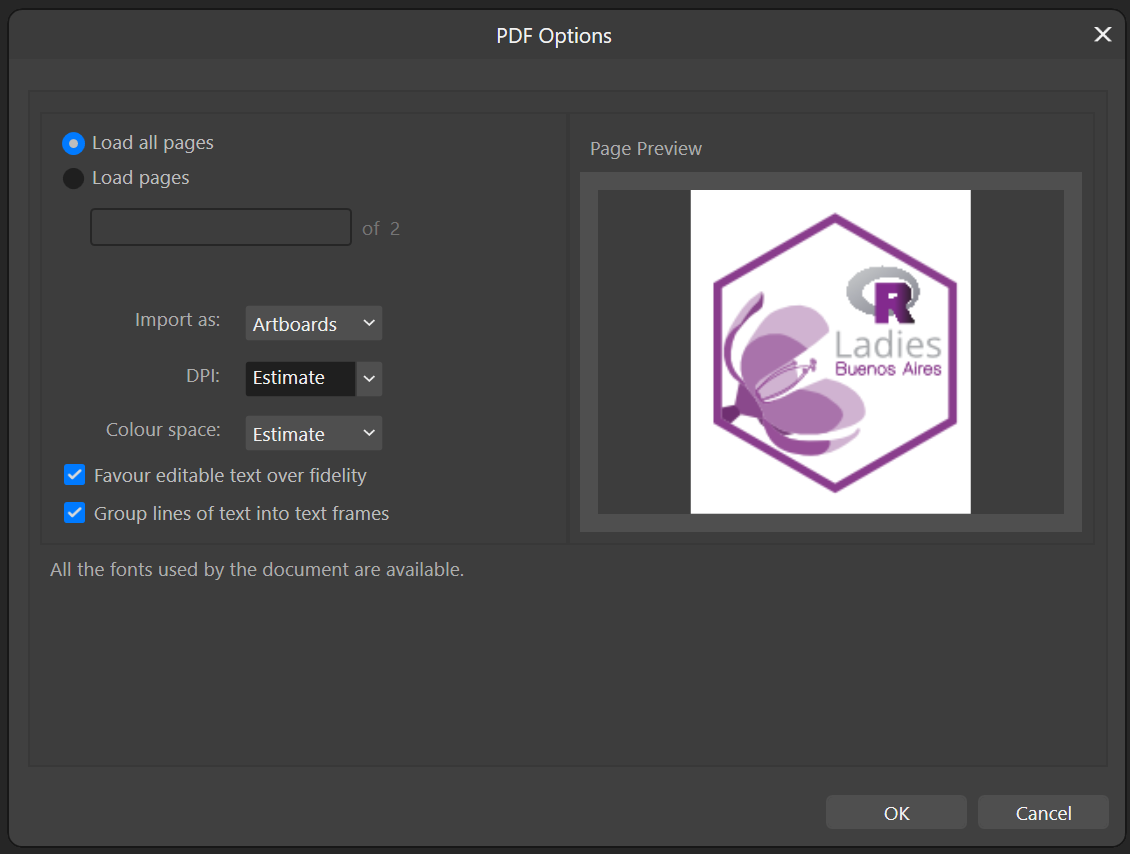
When importing a PDF, use the following settings:
Editing the template
Templates organise content into three layers:
- Logo layer — the RLadies+ logo elements
- Purple outline layer (locked) — the hex border
- Content layer — your chapter-specific content
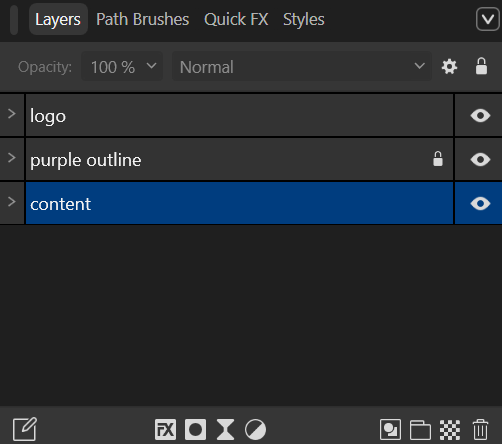
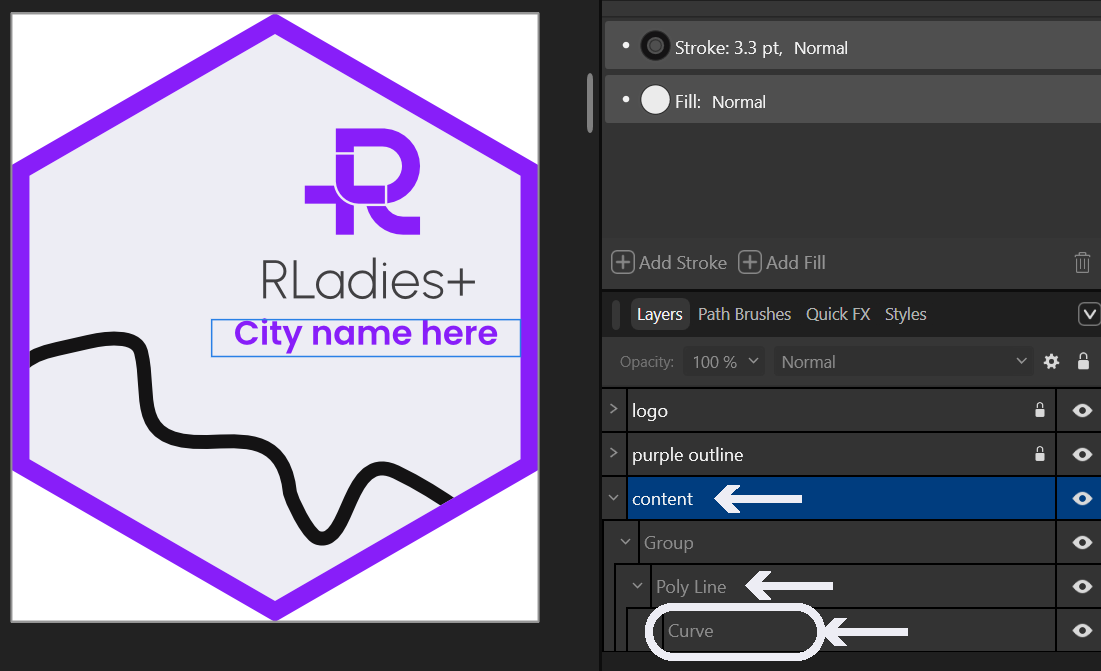
Select the Content layer to edit your chapter’s name and illustrations.

To find and select decorative elements like curves or wave paths, expand the Content layer in the Layers panel.
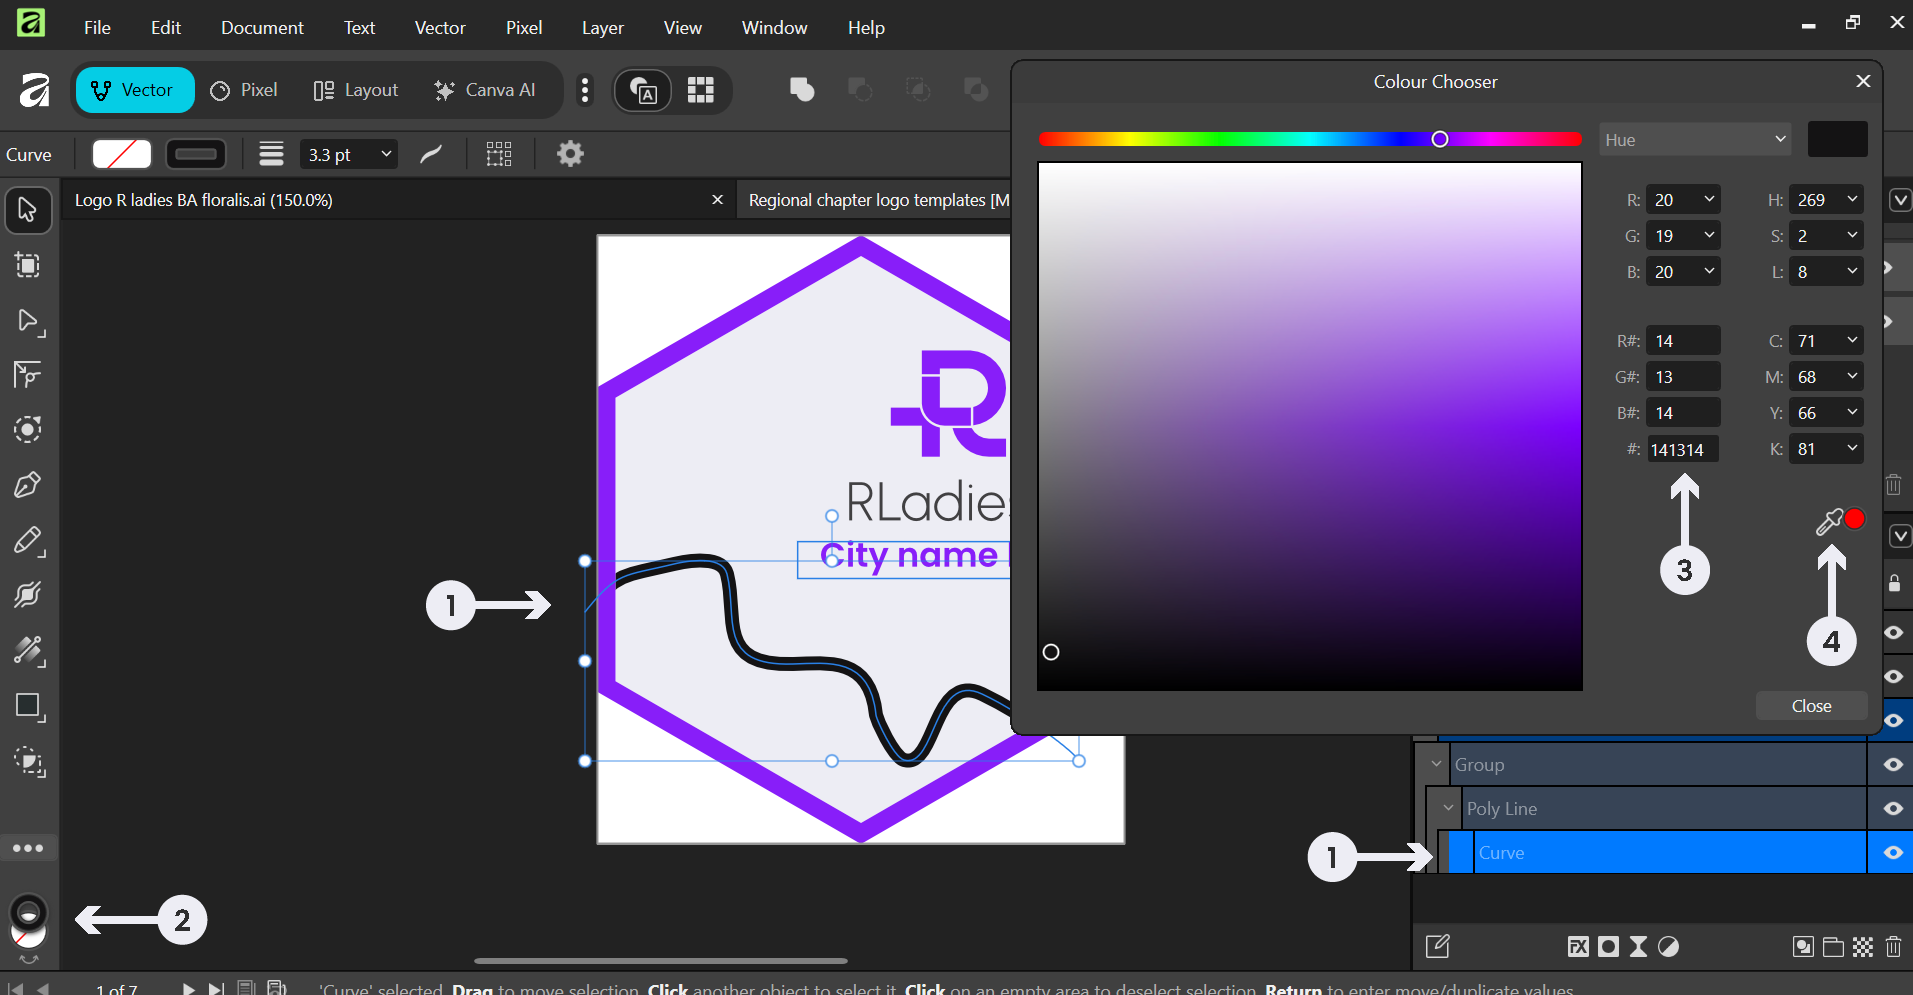
Recoloring
Apply the updated brand colors using either method:
Manual selection: Select an element, then open the Colour Chooser to change its stroke or fill colour.
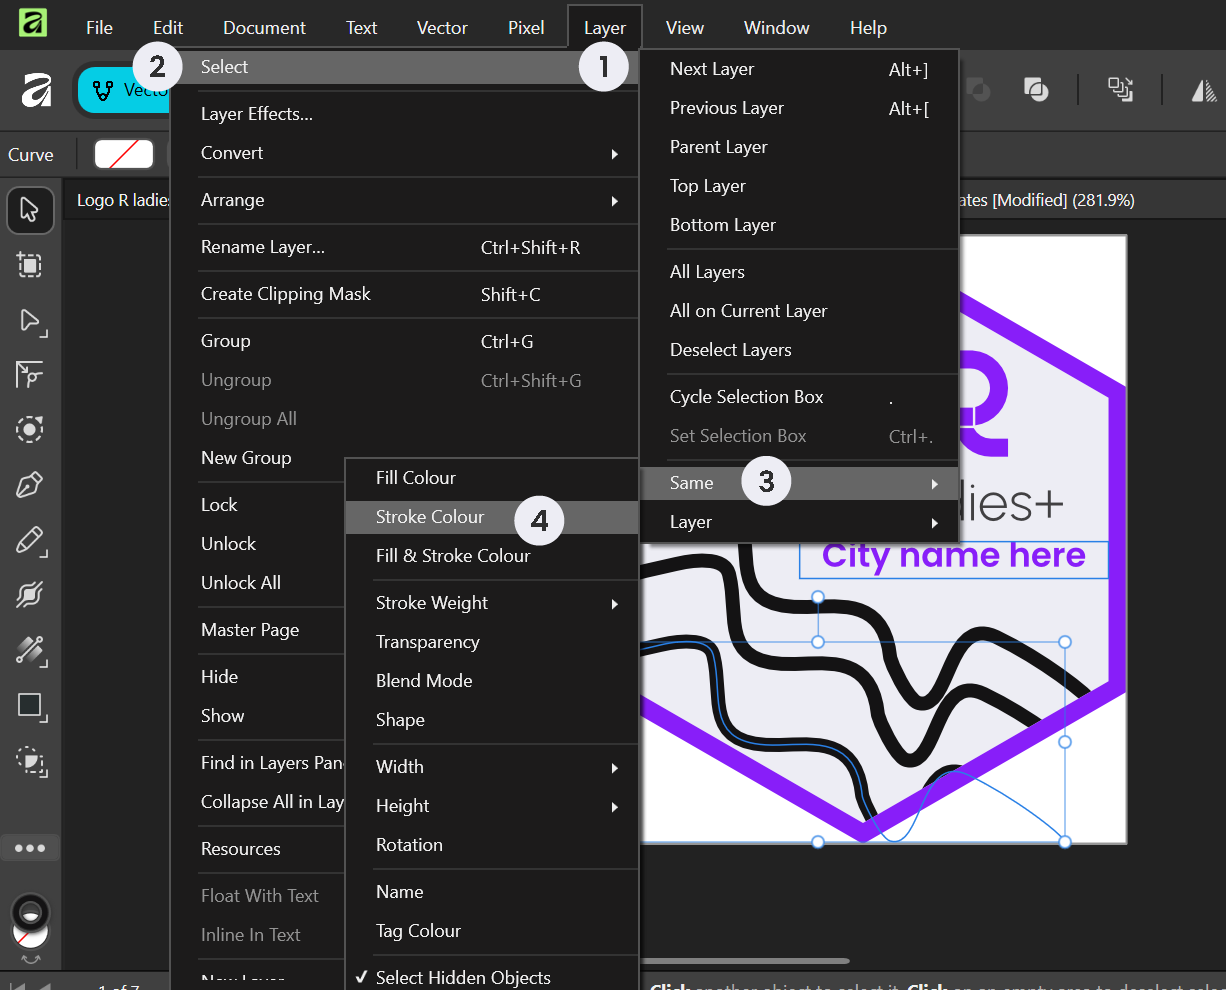
Batch selection: Use Layer > Select > Same > Stroke Colour to select all elements sharing the same colour at once, then change them all together.
| Color | Hex code |
|---|---|
| Blue Violet | #881ef9 |
| Bastille Black | #2f2f30 |
| Lavender White | #ededf4 |
| Brilliant Rose | #ff5b92 |
| Dodger Blue | #146af9 |
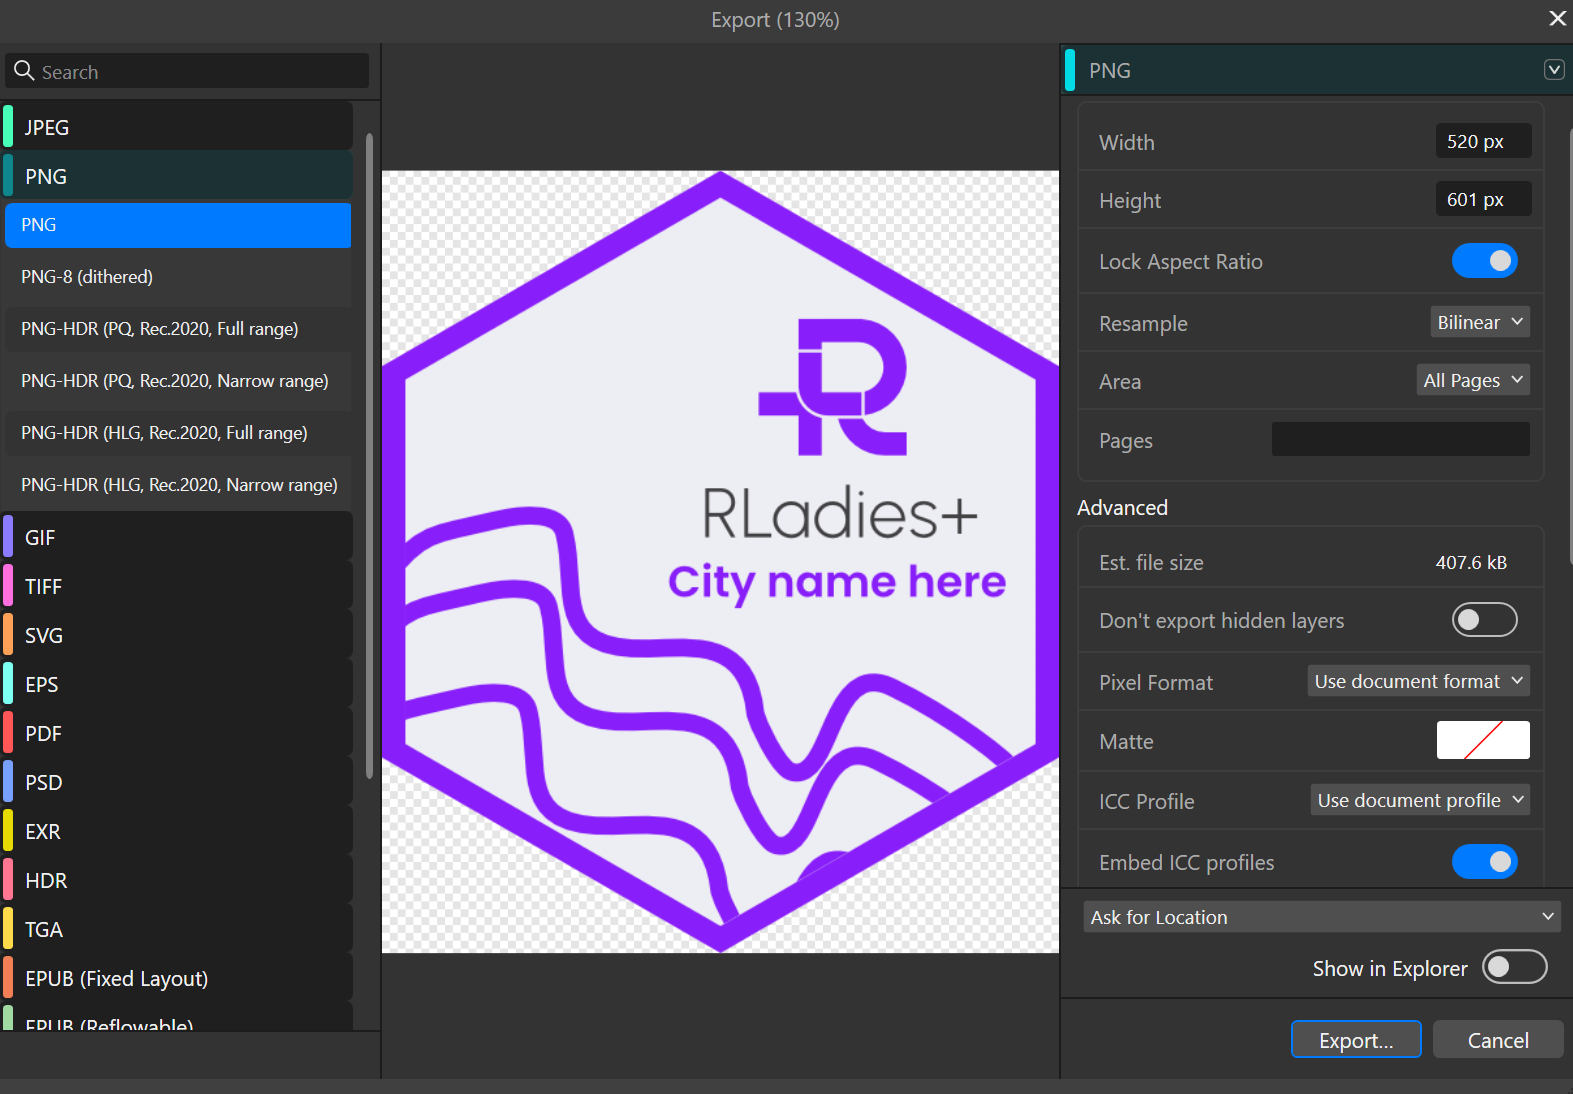
Exporting
- Go to File > Export
- Select PNG format and appropriate resolution
- Ensure the correct area or page is selected
- Click Export